
| Use | Command |
|---|---|
| Mount iOS phone to docker | docker run -it --privileged -v /dev/bus/usb:/dev/bus/usb -v /var/run/usbmuxd:/var/run/usbmuxd mvt |
| Get info on iOS device | ideviceinfo |
| Create iOS backup | idevicebackup2 --full [path/to/backup/folder] |
| Get the latest IoC’s | mvt-ios download-iocs |
| Decrypt the backup | MVT_IOS_BACKUP_PASSWORD="mypassword" mvt-ios decrypt-backup -d /path/to/decrypted /path/to/backup |
Mobile Forensics: iOS
With the Mobile Verification Toolkit

Introduction
MVT (mobile verification toolkit) is an open source tool used for scanning mobile devices for malware, or more specifically, spyware, such as Pegasus and Predator.
This toolkit is currently only supported on Linux and macOS. Running on Windows is possible with Subsystem for Windows, or in a VM (Probably). Your mileage may vary with Windows.
We will be making use of the MVT Docker image as this greatly simplifies setup and running.
This guide focuses on getting the analysis. A future guide will provide guidance on analyzing the results.
Chapter One: iOS Forensics
Thankfully for us (or not thankfully, depending on your situation), the amount of forensic data that we can extract from an iPhone is much more thorough than what we were able to get from Android.
The process will be slightly different from our extraction process on Android. MVT requires one of two things to work:
1. A file dump of the phone (on iPhone this requires jailbreaking), or,
2. A backup of the phone
The easier option in both cases is the backup. When and how we get those will depend on our specific requirements. On Android, the backup is captured during the process of running mvt-android. With iOS we need to create the backup prior to starting the scan. Most importantly, in order to get the most information from the backup, encryption should be turned on (you will need to know the password too).
Chapter Two: Prepping your Devices
As in part one, we will make use of the MVT docker image for this process. If you have not already done so, you can refer to that guide in order to get setup. Once that is complete you will need to create a backup of your iOS device. This can be done inside the docker container or outside of the container.
Again, per MVT’s instructions, in order to capture the most amount of data you will need to capture an encrypted backup (fn). Several methods exist to accomplish this.
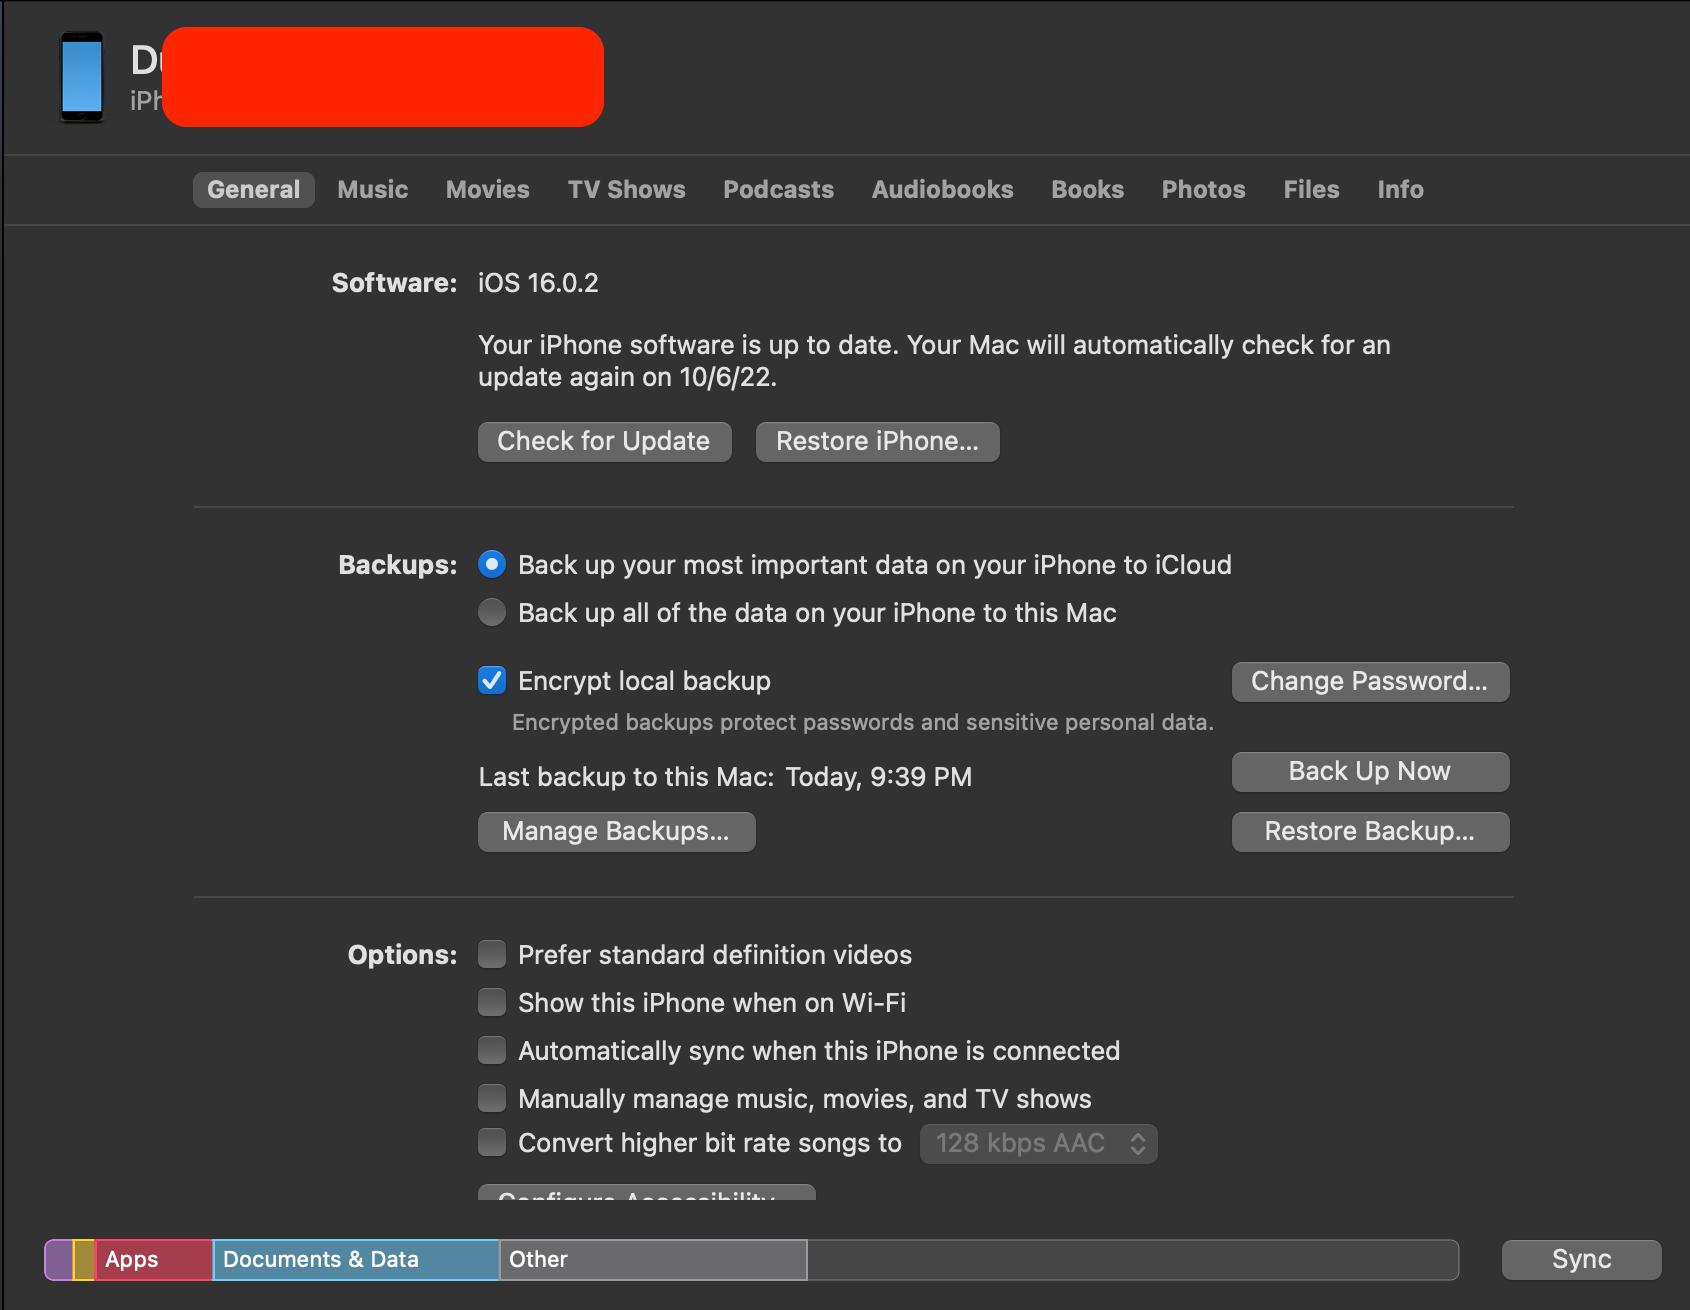
1. Use a MacBook: If you have a MacBook, create a backup using Finder. Just plug in the phone, trust the computer on the phone when prompted. Then navigate to Finder, and create the backup (fn). Keep in mind, doing it this way will also introduce in some additional steps such as getting the backup into the docker image. This is not at all impossible, just one more step in the process.
2. Use iTunes on a Windows computer: TODO
3. Use idevicebackup2: This is an open source library that is already installed on the docker image that we have set up. This is the easiest option as we can create our backup in the same location we will be performing the scan. Done right, this option works really well.
With whichever method is chosen, encrypted backups yield the best results.
Turning on encryption:
Let’s tackle this first as it can be a bit hairy. Ideally, encrypted backups are on, and you know the backup password. You may find that encryption is on, but you have lost the password. In this case, we will need to take several steps in order to get encryption on, with a password that we know and can feed into mvt-ios.
From idevice:
1. Inside the docker container, run:
idevicebackup2 -i encryption onIf this presents an error due to not knowing the password, you can try turning encryption off (idevicebackup2 -i encryption off) and then back on again. Refer to the Mount iOS phone to docker section in helpful commands in order to get the phone mounted into the container.
2. You can also just try changing the encryption password:
idevicebackup2 -i changepwFrom a MacBook:
Backup Option 1:
On the Mac, navigate to the finder as shown above and select backup now. This will create a local back up on your MacBook. Time to complete will very based on the size of storage on your phone. After it is completed, copy the backup to the docker container. Backups are stored here: ~/Library/Application Support/MobileSync/.

Once you have located the backup, copy it to docker container.
Backup Option 2:
TODO
Backup Option 3:
This option is the easiest.
1. Create a shared folder on the host. This will be used to transfer files between the host and the docker image. case_files
2. Launch docker container:
docker run -it --privileged -v /dev/bus/usb:/dev/bus/usb -v /var/run/usbmuxd:/var/run/usbmuxd -v case_files:/home/cases mvt3. Once inside the docker image, run `ideviceinfo` to verify that the iPhone has been mounted to the docker container.
4. Create some additional folders inside the container:
mkdir iOS_backup dbackup findings.5. Create the iOS backup:
idevicebackup2 --full backup iOS_backupChapter Two: Scanning the Backup
Now that we have a backup of the iPhone, we can scan the backup IoC’s
1. Download the latest IoC files:
mvt-ios download-iocs2. Decrypt the backup:
MVT_IOS_BACKUP_PASSWORD="mypassword" mvt-ios decrypt-backup -d dbackup/ iOS_backup/Be sure to replace maypassword with your iOS backup password.
3. Once that process is complete, you will be able to run the scan:
mvt-ios check-backup --output findings/ /dbackup/*4. Once completed mvt will dump a series of json files into the findings folder. If all the setup was completed correctly, the findings will exist both inside the docker contain _and_ on the host machine. Since Docker containers are ephemeral, we will want to make sure that that all our work is preserved. That is why we have set up the shared folders.